The card
Hyde Mountain scorecard: hole by hole, par and yardage on Mara Lake
The Hyde Mountain golf course scorecard below covers all eighteen holes with par, stroke index and yardage from every rated tee, plus what each one asks for.
- Par
- 72
- Out / In
- 3,436 / 3,265
- Longest
- 18th, 590 yds
- Shortest
- 16th, 172 yds
- Tees
- 4 rated
The Hyde Mountain scorecard in full
The Hyde Mountain golf course scorecard runs to par 72 across four rated tee sets, 6,701 yards at its longest and 5,049 at its shortest. Both nines are par 36, each holding two par 3s and two par 5s, which is a more balanced distribution than most hillside routings manage. What the numbers will not tell you is the elevation, and on this course elevation is most of the argument. The full Hyde Mountain scorecard, hole notes and tee ratings are all below.
Read the strip above and two things stand out. The eighteenth and the twelfth are the only holes past 570 yards, and they sit at opposite ends of the round. The sixteenth, at 172 yards from the back, is the shortest thing on the property and is bracketed by two of the more demanding par 4s. A hole by hole guide to the whole routing follows further down.
Par, yardage and stroke index
The Hyde Mountain scorecard in full, with par, stroke index and yardage from all four rated tees:
| Hole | Par | Index | Black | Blue | White | Red |
|---|---|---|---|---|---|---|
| 1. Early Bird | 5 | 7 | 568 | 524 | 507 | 459 |
| 2. Oasis | 4 | 17 | 358 | 327 | 296 | 271 |
| 3. Calm Before the Storm | 3 | 15 | 150 | 123 | 116 | 92 |
| 4. Geronimo | 4 | 3 | 483 | 461 | 438 | 310 |
| 5. The Bear | 4 | 1 | 380 | 356 | 331 | 283 |
| 6. Jekyll and Hyde | 5 | 13 | 492 | 471 | 452 | 387 |
| 7. Creekside | 4 | 9 | 368 | 345 | 300 | 278 |
| 8. Big Dog | 4 | 5 | 423 | 394 | 367 | 340 |
| 9. Serenity Now | 3 | 11 | 214 | 188 | 159 | 137 |
| Out | 36 | 3,436 | 3,189 | 2,966 | 2,557 | |
| 10. Double Trouble | 4 | 18 | 348 | 335 | 321 | 310 |
| 11. Eagle Nest | 4 | 16 | 338 | 323 | 288 | 262 |
| 12. Mountainside | 5 | 6 | 577 | 544 | 487 | 455 |
| 13. Hyde and Seek | 4 | 14 | 344 | 330 | 306 | 281 |
| 14. Tee with a View | 3 | 4 | 237 | 212 | 183 | 152 |
| 15. Cliffside | 4 | 12 | 310 | 292 | 261 | 207 |
| 16. Volatile | 3 | 10 | 172 | 139 | 108 | 86 |
| 17. Equalizer | 4 | 8 | 349 | 326 | 302 | 276 |
| 18. Picturesque | 5 | 2 | 590 | 557 | 524 | 463 |
| In | 36 | 3,265 | 3,058 | 2,780 | 2,492 | |
| Total | 72 | 6,701 | 6,247 | 5,746 | 5,049 |
Stroke index is where the Hyde Mountain golf course scorecard gets interesting. Index 1 is the fifth, a 380-yard par 4 — short on paper, but it climbs to a green set well above the fairway and both sides of the fairway are marked as lateral hazards. Index 2 is the eighteenth at 590 yards. Index 3 is Geronimo, the hole everyone comes for. The easiest hole on the card by index is the tenth, a 348-yard par 4 whose only real defence is a raised, hidden green.
Yardage alone under-describes this course, which is the recurring theme of any hole by hole guide to it. From the white tees the yardage drops to 5,746 and the rating to 68.5, but the vertical stays exactly where it was — the tees move forward, the hillside does not. That is the single most useful thing to take from the Hyde Mountain scorecard: the numbers shrink, the climb does not.
Course rating and slope by tee
Four sets are rated, and the course rating and slope tell you more about the round ahead than the yardage does:
| Tee | Yards | Course rating | Slope |
|---|---|---|---|
| Black tees | 6,701 | 72.7 | 136 |
| Blue tees | 6,247 | 70.7 | 133 |
| White tees | 5,746 | 68.5 | 122 |
| Red tees | 5,049 | 68.6 | 109 |
A slope of 136 off the black tees is firmly above the 113 average, and it is high relative to 6,701 yards. Compare the white tees: 5,746 yards, rating 68.5, slope 122. The drop in slope between black and white, 14 points, is largely about carries — the fifteenth needs 175 yards over a ravine measured from the blue markers, and moving forward takes that shot out of play. Anyone deciding which tees to use should read the course rating and slope together rather than picking on length alone.
How the Mara Lake slope changes the numbers
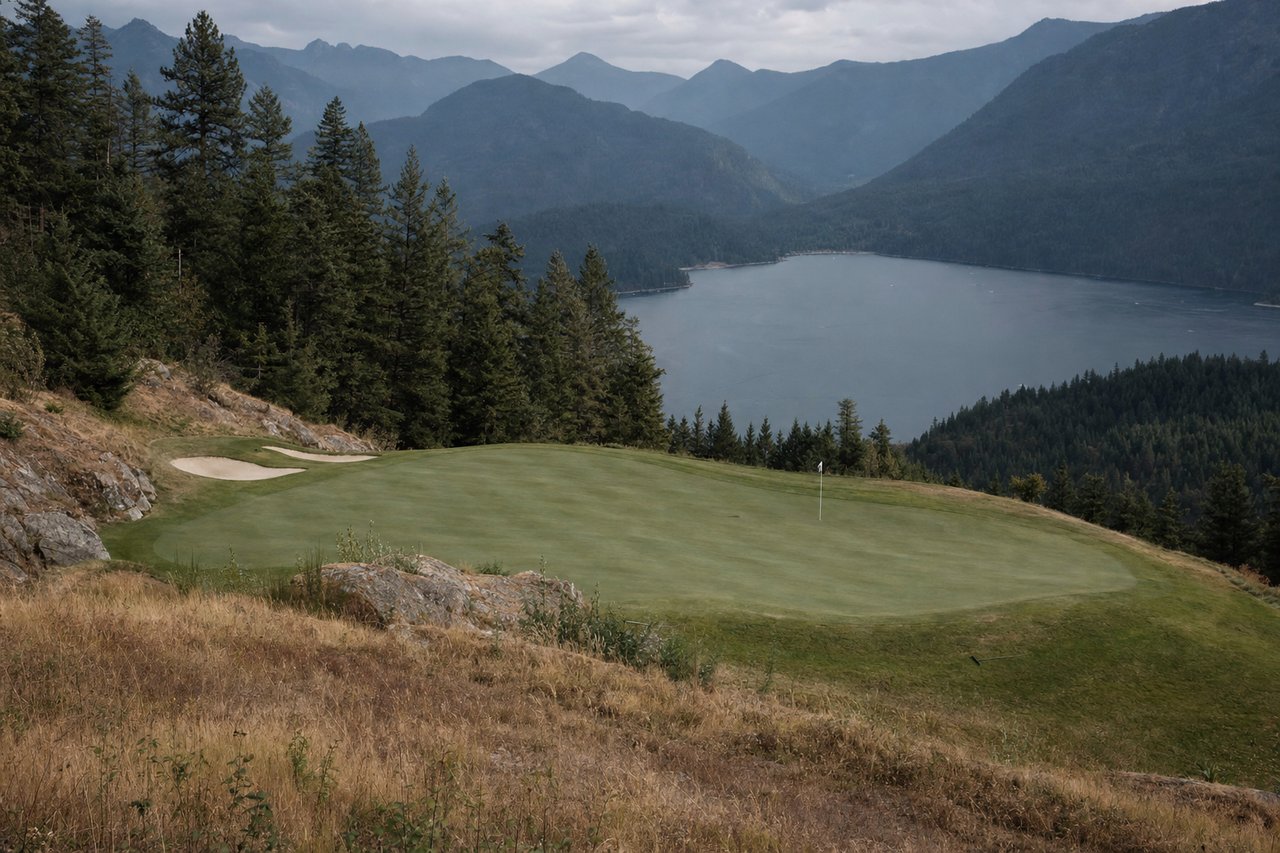
The routing is cut into the hillside above Mara Lake, and the water sits below the course rather than beside it. That geometry produces the two effects every regular here talks about. Uphill approaches — the fifth, the tenth, the eleventh — play a club or two longer than the yardage. Downhill tee shots on the fourth, the fourteenth and the seventeenth play shorter, and in the case of the fourth, dramatically shorter.
The second effect is roll. Several landing areas slope away from the player, and the card’s own guidance on the eighth is to expect an extra ten to twenty yards of run, which is why a long iron holds that fairway where a driver runs through it. On the thirteenth and eighteenth the ball moves right on landing, so the left half of the fairway is the line. None of this appears anywhere on a scorecard.
Hole by hole through the front nine
Names and pars are the course’s own; yardages come from the rated card. The three holes marked below are the signature holes, and the hole by hole guide that follows describes what each one asks for rather than repeating the numbers above.
Early Bird
Par 5 · 568 yds black · 507 yds white · index 7
An unthreatening opener. The tee shot is generous, with the line running on or just left of the target marker. Most players lay up short of the water rather than taking it on, which leaves a short approach into the green.
Oasis
Par 4 · 358 yds black · 296 yds white · index 17
Favouring the right half of the fairway opens the best angle in. The difficulty is all at the green, which is cut into two distinct tiers — a pin on the lower shelf punishes too much club, and a pin on the upper shelf punishes too little.
Calm Before the Storm
Par 3 · 150 yds black · 116 yds white · index 15
A short par 3 with little trouble, and the last easy tee shot for a while. The miss to avoid is long and left, through the back of the green. Geronimo follows.
Geronimo
Par 4 · 483 yds black · 438 yds white · index 3
The hole the course is known for. The landing area sits 260 feet below the tee, and a local rule allows only one tee shot, with a drop area right of the 150-yard marker for a lost ball at a one-shot penalty. The ball kicks right on landing, so the left side of the fairway is the line. The second plays a club longer than the yardage suggests because of the elevation change at the green.
The Bear
Par 4 · 380 yds black · 331 yds white · index 1
The hardest hole on the card at stroke index 1. The line is right of the target pole, and a fairway wood carries further than a driver here for most players. Both sides of the fairway are marked as lateral hazards. The green sits well above the fairway, so one or two extra clubs is normal — anything short stays short.
Jekyll and Hyde
Par 5 · 492 yds black · 452 yds white · index 13
Distance off the tee counts for little. The corner is not worth cutting; a fairway wood down the middle followed by another leaves nothing more than a short iron or a pitch.
Creekside
Par 4 · 368 yds black · 300 yds white · index 9
Easier-looking than it plays. Water runs down the left of the fairway and again in front of the green. A front pin is the awkward one, and the approach is better long than short.
Big Dog
Par 4 · 423 yds black · 367 yds white · index 5
Length is only part of it. The landing area slopes away, adding perhaps ten to twenty yards of roll, so a long iron or utility wood holds the fairway where a driver runs through it. Cutting the corner brings a small, equally sloped landing area into play. The approach is long, and the right half of the green is the safer side.
Serenity Now
Par 3 · 214 yds black · 159 yds white · index 11
A par 3 that rewards ignoring the pin. The left side of the green is the play whatever the flag is doing; missing right leaves a recovery most players would rather not face.
Hole by hole through the back nine
Double Trouble
Par 4 · 348 yds black · 321 yds white · index 18
A short par 4 with an undemanding tee shot to the right side — the visible bunkers are out of range for most. The difficulty is the second: the green is elevated and hidden on the approach, and consistently plays longer than it looks.
Eagle Nest
Par 4 · 338 yds black · 288 yds white · index 16
Short but not simple. A fairway wood to the centre or centre-left is enough, leaving a short iron that is best flown high into the elevated green. Missing long, particularly long left, is the error to avoid. The putting surface is large and full of movement, and two putts are not a given.
Mountainside
Par 5 · 577 yds black · 487 yds white · index 6
The one hole where distance is worth chasing. The line is over the marker or slightly right of it, avoiding the left rough. The second is best aimed down the left of the fairway, since the ball moves right on landing and water waits on that side. What remains is a short approach.
Hyde and Seek
Par 4 · 344 yds black · 306 yds white · index 14
Another short par 4 where accuracy beats power — club choice off the tee barely matters. The left side of the fairway is the line, because the ball rolls right when it lands, leaving a short iron into a receptive green.
Tee with a View
Par 3 · 237 yds black · 183 yds white · index 4
The second of the course's own picks, played from a steeply elevated tee where club selection is the whole hole. In calm conditions two clubs less than the yardage is normal. The trouble is through the back, so the long miss is the expensive one.
Cliffside
Par 4 · 310 yds black · 261 yds white · index 12
It looks harder than it plays, but the tee shot has to carry — a minimum of 175 yards measured from the blue markers to clear the ravine. There is an optional drop area left, short of the fairway bunker, at a one-shot penalty. From the fairway a short iron finishes the job.
Volatile
Par 3 · 172 yds black · 108 yds white · index 10
A short one where the green does the work. Aiming left of the flag accounts for the run-off, since most shots move right on landing. The trouble sits back and right.
Equalizer
Par 4 · 349 yds black · 302 yds white · index 8
The third hole the course singles out. The tee is high, the landing area slopes, and the longest hitters can reach the green — worth checking the group ahead has cleared. The right side of the fairway near the lone tree is the target; the left is a lateral hazard. The green is small, guarded by a pronounced ridge running front to back through its centre, so the approach is better flown high.
Picturesque
Par 5 · 590 yds black · 524 yds white · index 2
A closing par 5 with room to swing. The left side of the fairway is the line and the driver is worth taking. The second needs thought: the fairway falls away right, and the ideal lay-up sits about 125 yards from the centre of the green. As on several holes here, landing left of the flag allows for the roll. The view from the last is the part most players remember.
Two of the three signature holes fall on this nine. The fourteenth is the short one people photograph after the fourth, and the seventeenth is the one that decides more matches — a small green with a ridge running front to back through the middle of it, approached from a high tee with the ball above your feet.
Questions about the card
What is the course rating and slope at Hyde Mountain?
Black tees are rated 72.7 with a slope of 136 over 6,701 yards. Blue: 70.7 and 133 over 6,247. White: 68.5 and 122 over 5,746. Red: 68.6 and 109 over 5,049. Par is 72 from every set.
Which are the signature holes?
Three are singled out on the card. The fourth, Geronimo, a par 4 with its landing area 260 feet below the tee. The fourteenth, Tee with a View, a par 3 from a steeply elevated tee. The seventeenth, Equalizer, a par 4 played from a high tee to a small green divided by a ridge.
How long is the course from the forward tees?
5,049 yards from the red tees, rated 68.6 with a slope of 109 — the gentlest of the four sets by some distance, mainly because it removes the forced carries rather than because it removes length.
What is the hardest hole?
By stroke index, the fifth — a 380-yard par 4 rated index 1. It climbs to a raised green with lateral hazards down both sides of the fairway, and the approach usually needs one or two clubs more than the yardage suggests. Being short of this green leaves the ball short.
Is there a forced carry anywhere?
The fifteenth is the one to know about. Clearing the ravine requires a minimum carry of 175 yards measured from the blue markers. There is an optional drop area left, short of the fairway bunker, at a one-shot penalty.